Contacts & Groups
Contacts
Contacts are message recipients whose details you have saved in EziMessage. Contacts can be shared within your organisation or private to you.
Contacts can be organised into groups to allow you to send messages to an entire group rather than adding each contact individually.
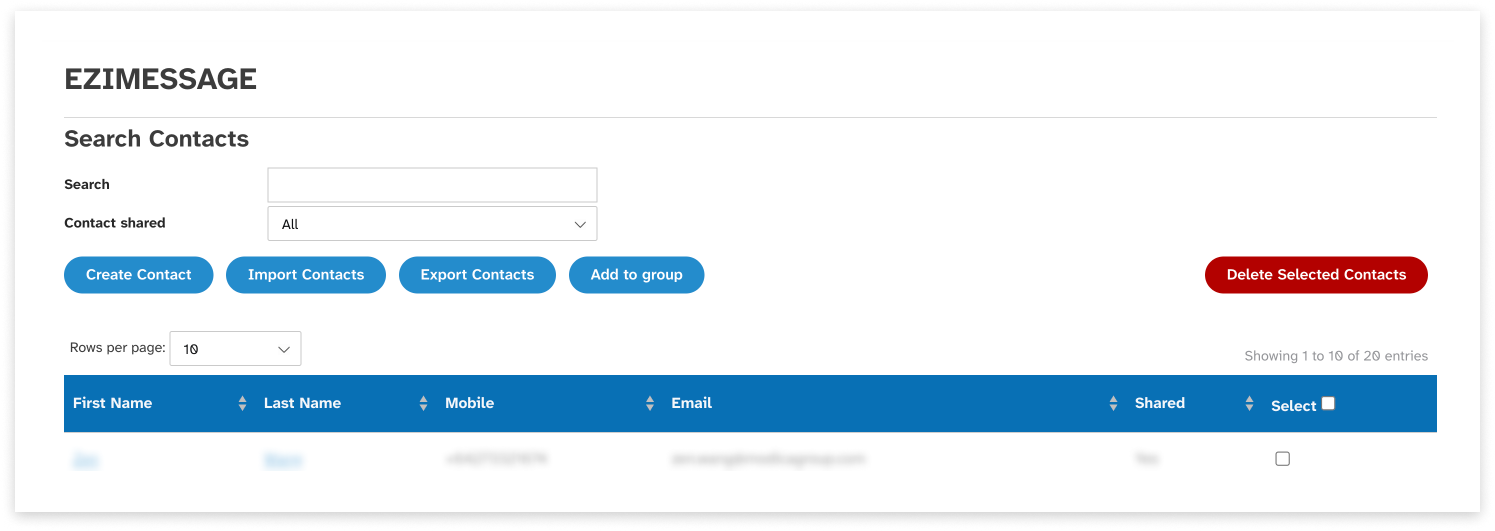
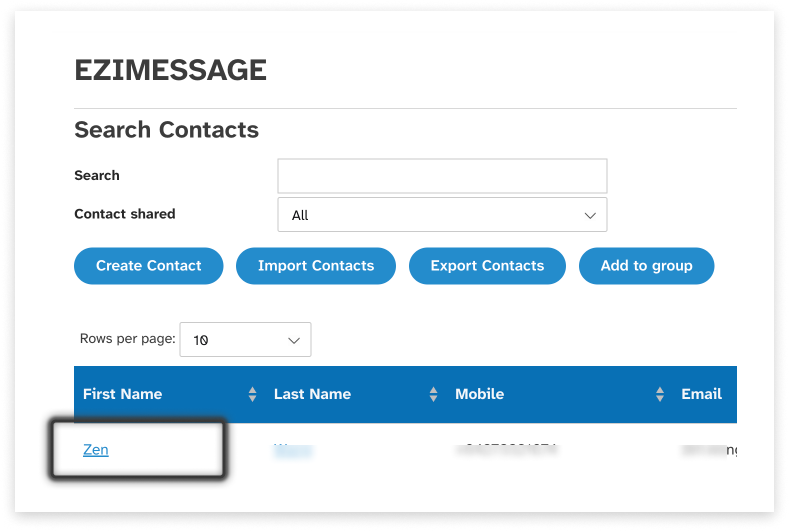
View Contacts
To see a list of your contacts, navigate to the Contacts tab. You can view:
- The contact’s name and contact details
- Whether the contact is shared (visible to others in your organisation)
Narrow down the list using the search fields. You can search for contacts by name, mobile number or email address, as well as whether they are shared or private.
Create a Contact
You can create contacts manually or by importing contact data from a spreadsheet.
You can create:
- Up to 5,000 shared contacts
- Up to 5,000 private contacts
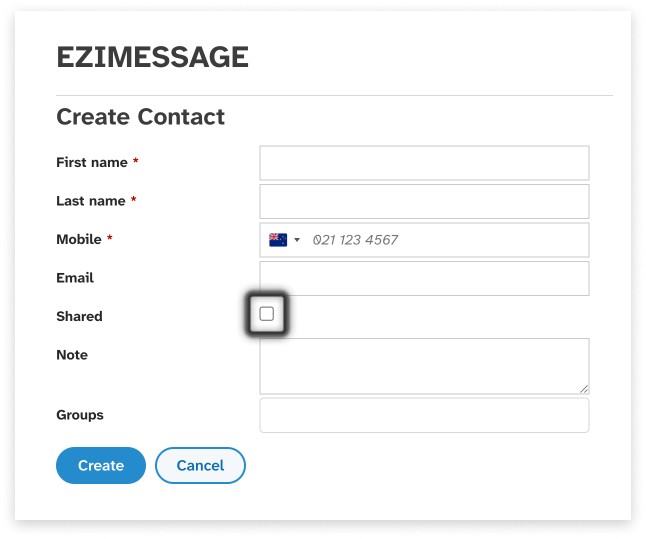
1. Create a contact manually
To manually create a contact:
- Navigate to the ‘Contacts’ tab
- Click ‘New contact’
- Enter the contact’s name and details
- This contact is shared with others in your organisation
- If you wish, add the contact to a group
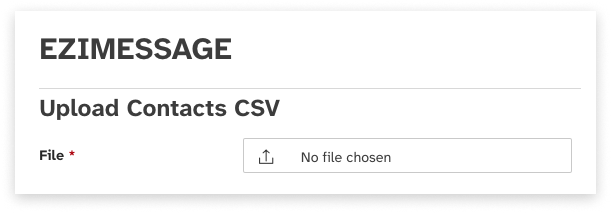
2. Import contacts
To import contacts from a spreadsheet:
- Prepare a CSV file of contact information using the file format instructions below
- Navigate to the ‘Contacts’ tab
- Click ‘Import contacts’
- Ensure that any groups you would like to add contacts to have been created
- Select and upload the file
Contact File Format
The contact file must meet the following requirements.
- The file must be either:
- A CSV file
- A TXT file containing plain text with fields separated by commas and records separated by line breaks
- The file must have a header row containing the correct field names. Some variations on field names are allowed; for a full list, see the ‘Permitted field headings for contact upload’ section of this user guide
- Each contact record must include a mobile phone number. All other fields are optional
- Up to 5,000 shared and 5,000 private contacts can be stored in EziMessage
- Contact records must conform to the formatting requirements listed below
- The CSV must be encoded in UTF-8.
| Field name | Description | Required/optional | Data format | Field length |
|---|---|---|---|---|
| Mobile | Contact’s mobile phone number. | Required | Correctly formatted mobile phone number:
|
Minimum 9 characters. |
| First Name | Contact’s first name. | Optional | Alphanumeric characters. | Maximum 100 characters. |
| Last Name | Contact’s last name. | Optional | Alphanumeric characters. | Maximum 100 characters. |
| Contact’s email address. | Optional | Correctly formatted email address. | Maximum 200 characters. | |
| Shared Contact | Whether the contact will be shared with other users in your organisation. | Optional | One of the following:
|
N/A |
| Group Name | Name of an existing group to which the contact should be added. | Optional | Alphanumeric characters. Group names are case-sensitive. The contact may be added to multiple groups by using a comma-separated list of group names that is enclosed in double quotation marks. For example: “GroupName1,GroupName2” | Maximum 255 characters. |
Template Contact CSV
The following files can be used as a basis for uploading contacts.
| Sample TXT file | Sample CSV file |
|---|---|
| EziMessage sample contact upload file.txt | EziMessage sample contact upload file.csv |
Permitted Field Headings
When importing contacts using a CSV file, there are a number of permitted field headings. Please ensure that the headings in your CSV file match one of the options below.
| Field | Permitted field headings |
|---|---|
| Mobile number |
|
| First name |
|
| Last name |
|
| Email address |
|
| Shared status |
|
| Group |
|
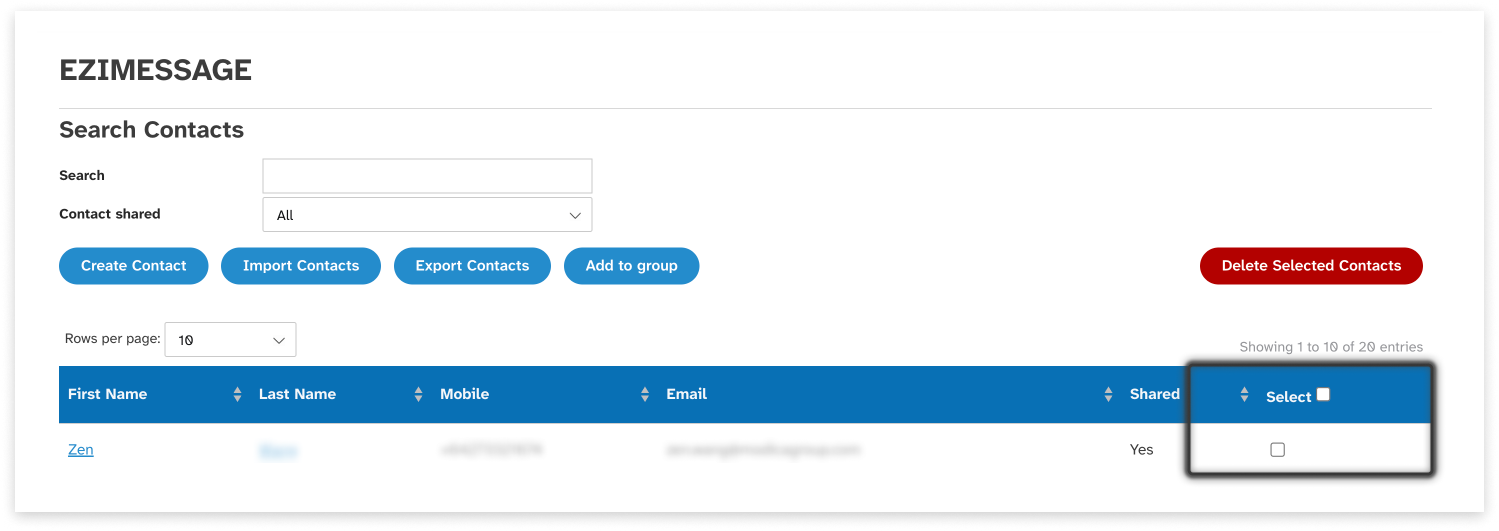
Add Contacts to Group
To add contacts to a group:
- Ensure you have already set up the group in the Groups tab. For details on creating groups, see the Groups section of this guide
- Navigate to the Contacts tab
- Locate the contact(s) to be added to the group
- Select the contact records in the list using the select box
- Click ‘Add to group’ button
- Select the group to which you wish to add the contacts
- Click ‘Submit’
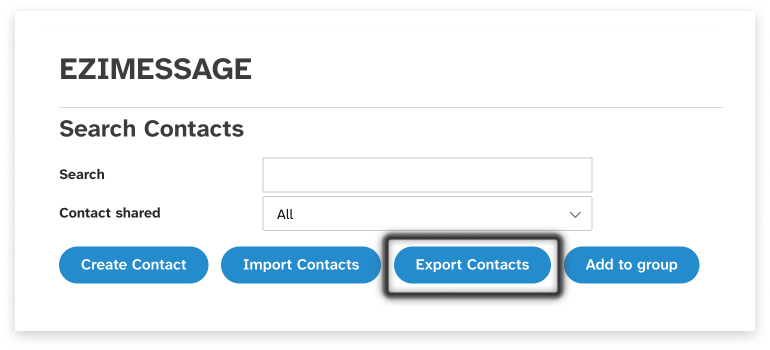
Export Contacts
To export a list of all your contacts and their details to a CSV file:
- Navigate to the Contacts tab
- Click ‘Export contacts’
- The CSV file will download automatically
Note: this action will download ALL your contacts, including any that are not displayed on the search screen
Edit or Delete Contacts
Edit Contacts
To edit the details of a contact:
- Navigate to the Contacts tab
- Locate the contact(s) to be edited
- Click on the contact’s first or last name
- Edit the contact’s details, add or remove them from groups, etc
- Click ‘Update’
From this screen, you can also view a history of messages received from or sent to this contact
Delete Contacts
To delete a contact:
- Navigate to the Contacts tab
- Locate the contact(s) to be deleted
- Select the contact records in the list using the select box
- Click ‘Delete’
Groups
Groups allow you to organise your contacts so that you can easily send bulk messages without having to enter all contacts individually.
Groups can be shared within your organisation or private to you. If a group is shared, all contacts within the group must also be shared. Private groups may contain a mixture of shared and private contacts.
View Groups
To see a list of your groups, navigate to the Groups tab. You can view:
- The group’s name
- Whether the group is shared (visible to others in your organisation)
- How many contacts (members) are included in the group
- Narrow down the list using the search fields. You can search for groups by name and by whether they are shared or private
Create a Group
To create a group:
- Navigate to the ‘Groups’ tab
- Click ‘Create a group’
- Enter the group’s name
- Choose whether the group is shared with others in your organisation. If it is shared, it may only contain shared contacts.
Add or Remove Contacts from Groups
Add contacts to a group on the Contacts tab. For more details, see the Add Contacts to Group section of this user guide.
Remove contacts from a group by editing the contact. For more details, see the ‘Manage contacts’ section of this user guide.